 |
|
All content on this site Copyright
©2002-2006 Dave Pinx. All rights reserved.
|
|
|
|
All content on this site Copyright
©2002-2006 Dave Pinx. All rights reserved.
|
![]()
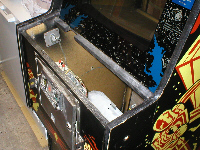 |
Control Panel Removal
So that i can replace the damaged C.p.o. i needed to first remove the Control panel from the Cabinet. Opening the coin door and looking inside underneath the C.P. are 2 latches one on either side, the same as Jamma cabs do. I unclipped these and as the cab had no game boards in it, the loom was already disconected, so i could just lift it off. |
![]()
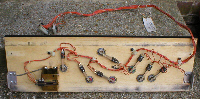 |
Button Removal
Now that the C.P. is removed i can easily get to the back of the buttons, so that i can remove them. It looked to me that the nuts on the back of the buttons were imperial and not metric, but i found that a 24mm spanner worked fine in undoing these.To be able to fit the new C.P.O. you have to remove all the buttons and the Joystick shaft. But you can leave all the leaf switches and the Joystick assembly in place. |
 |
![]()
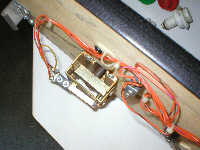 |
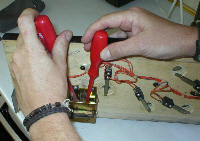
Joystick shaft Removal
This can be slightly tricky, as the shaft is held in place by a horseshoe type circlip, which is inside the metal housing. I found the easiest way to remove this, was to use 2 flat bladed screwdrivers ( see pic ) and push from either side of the open end and watch very carefully to see where it lands when it pings off ! Once this is removed the shaft can easily be pulled out of its housing.(Remember to put the clip somewhere safe, so it doesnt get lost) |
 |
![]()
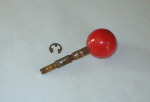 |
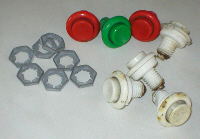
Clean up and Replacement
The Joystick shaft itself, has very little wear, but has gone a bit rusty with age.This im going to clean up using wire wool at first and then i will finish off using a bit of 3 in 1 oil and a bit of 3M scotchbrite, which should remove all the rust. Alot of the buttons are in quite a bad state, the white ones in particular, so i am going to replace these with some NOS ones, that i managed to find on Ebay at £2.00 each |
 |
![]()
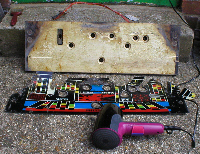 |
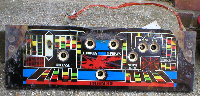
Old C.P.O. Removal
Not wanting to damage the wood underneath,i found the easiest way to pull the old C.P.O. off was to warm it up, using my wife's hairdryer (But dont tell her!) I found that this easily softened up the glue used to adhere the C.P.O. to the CP, as long as you take it steadily and dont try and pull it off too fast, you will find that it will peal back quite easily, as long as you keep waving the hairdryer over the area you are pulling at.Once you get past the Joystick hole, you can remove the rectangular washer that sits inside the wood of the joystick hole, and put it in the safe place you put the shaft and circlip ! I was heating for about 30 seconds and then pulling untill it got tough again and then i would heat the next area. All in all it took about 5 minutes to get it off ! |
![]()
|
New C.P.O Fitting
After rubbing down the C.P. with some medium coarse sandpaper, to give it a key for the adhesive backing to stick to, i then replaced the rectangular joystick washer into the reccess in the c.p.( DO NOT FORGET ) I found the easiest way to get the new c.p.o. in position, was to first remove the brown paper backing that covers the self adhesive coating, then rest the c.p. on my lap and put my fingers through the holes of the new c.p.o. and gently lower it into place ( DO NOT PRESS DOWN YET ) By not pressing down it means you can manoever the new c.p.o. if needed. I then got all the buttons and located them in there holes, untill they were seated nicely (not done up though) Doing it this way means, that as you press the buttons into place the new c.p.o. will move into its final position by itself, hence why i didnt press it down ealier ! Now the new c.p.o. can be pressed down firmly all over, taking your time to press everywhere.Then take out the buttons and remove the clear protective film which covers the cpo, it should now have that glossy look, replace the buttons and the nuts on the back of the buttons ( DO NOT OVER TIGHTEN ) Replace the joystick shaft and using a pair of long nosed pliers refit the horseshoe type circlip to the end of the shaft. Voila, one beautiful new c.p.o. fitted !! |
![]()
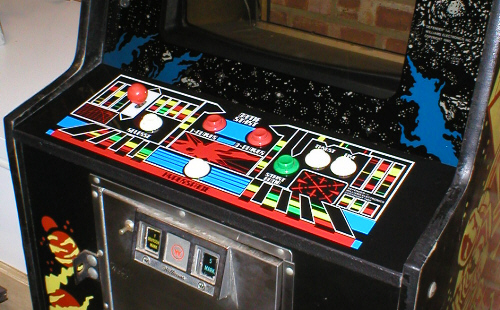
Doesnt it look great !! What a vast improvement, big cheesy grins all round : )
![]()
| Click Lander Alien for page 3 |
![]()