
|
All content on this site Copyright
©2002-2006 Dave Pinx. All rights reserved.
|
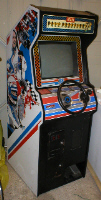
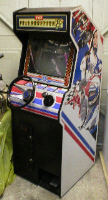
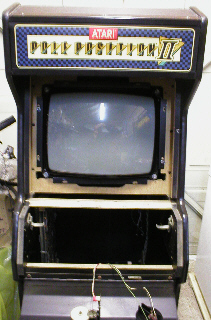
Pole Position 2 Upright
![]()
|
When i bought this cab it did'nt need that much work.... ....Or so i thought ! I must
also say a very big Thankyou
to the following people, |
 |
 |
 |
 |
 |
![]()
 |
 |
 |
![]()
|
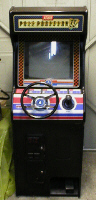
Built
at Atari (Ireland), this Cab has
been through a South coast Op and 2 UKVAC collectors, that i know of,
where else it has been, who can say, but it is extremely tidy. Even
though this Cab was built at Atari it
was liscenced to them from Namco and
has a Namco
boardset in it, which ironically still uses
Atari components, but has a different pcb layout to the Atari
version.
Namco designed and produced the game, for world wide distribution, except for the U.S.A. which was covered by Atari production. Atari (Ireland), was therefor supplied with Namco hardware, as it covered Europe production. |
![]()
|
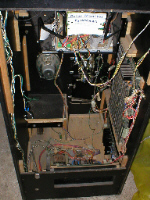
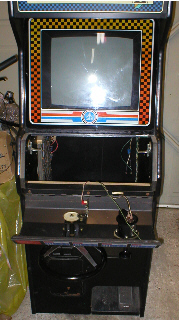
First
Inspection.
First things first, what is exactly wrong with the Cab, well i was told just that the LOPT on the Monitor had died and the boardset was corrupt.. But taking a closer look at it, once i got it home, i found a few other things ! |
![]()
 |
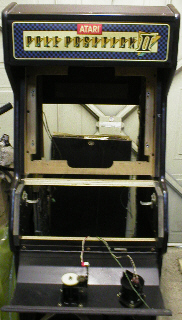
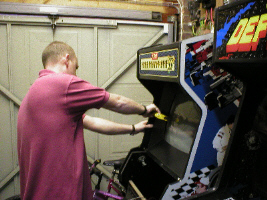
Unclipping
C.P. As i was told the Monitor had a dead LOPT, i've decided to take this out first and find out if this is the problem, or if there is something else wrong, like a dead chasis. The Monitor has to come out from the front, so i needed to unclip the C.P. the same as you would a Jamma cab and then lower the C.P. down so it rests on its hinges. I found it easier to take the back door off and lean inside and undo the clips from there, rather than struggle with my arm up inside the coin door, like you would on a Jamma cab. This then gave me access to the Monitor glass. WORD OF WARNING !! Monitors are probably the most Dangerous thing in an Aracde Cabinet, as they can hold voltages of up to 35,000 volts !!!! DO NOT try this at home, unless you know what you are doing. |
![]()
| Monitor
glass / Cardboard Bezel removal. Once the Monitor Glass was removed, i wrapped it in bubble wrap and an old towell and put it somewhere safe, where it would'nt get accidentally broken. Once removed it gave access to the underlay Bezel, which is just a shaped piece of black cardboard, which was origionally stapled to the wooden frame of the Cab in 4 places. These however, were now missing, so this Monitor must have been taken out before on at least one occasion. As the staples were already missing, it was just a case of gently lifting it out. This was quite dirty with dust and again was put in a safe place out of the way. |
 |
 |
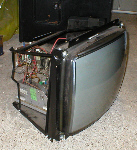
Monitor
Removal. Once the Bezel was out the way i could see where the 4 securing bolts for the Monitor were, or should be !!! But there were no bolts, just 2 self tapping screws, one in each corner, holding it in place. To think that this cab had been jiggled all over the place, bumped around on sack trucks and laid down in the back of a van, i was surprised it was still holding in place. I undid these screws unplugged the video loom plug from the chasis (but not the power one as that was missing, but i'll come to that later) and lifted the monitor out, making sure not to knock the back of the Monitor against anything and possibly damaging the tube (necking) as its called. |
![]()
 |
Monitor.
*
Since i finished this restoration, i have now learnt how to discharge
and repair monitors myself. |
 |
 |
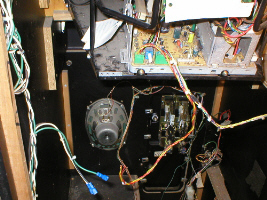
Missing
plug. As i mentioned earlier i removed the video signal plug from the chasis board, but the power plug was missing and all that was left was some loose wires at the end of the loom, these i obviously need to source. |
 |
![]()
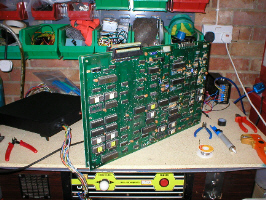 |
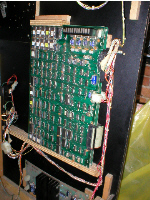
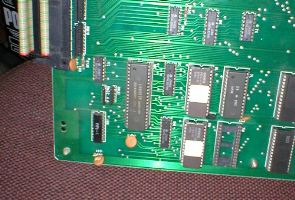
Gameboard
set. Whilst i wait for the Monitor to be fixed, i have decided to take a look at the gameboard set of pcb's. Starting with the basics, i checked for touching pins and dry joints on the solder side of both pcb's. I gave both edge connectors a good rub with a pencil rubber as these were quite tarnished. I then reseated all the ROMS, Customs and socketed RAM. Unclipped the ribbon connectors and sprayed these with contact cleaner. |
![]()
| Snapped
Capacitors. I then checked the pcb's for snapped capacitors and found 2, one at A10 and the other at M11, both of these were only hanging on by 1 leg ! |
 |
![]()
 |
Snapped
Capacitors cont ...
These were both 104z capacitors which i happen to keep in stock (common on galaxian pcb's) and are relatively easy to fit, once i had replaced these, i clipped the 2 boards back together and fitted them back in the cab, i wont know whether they work or not till i get the monitor back in and as they have 2 edge connectors and 2 molex connectors, i cant test them on my test rig. |
 |
![]()
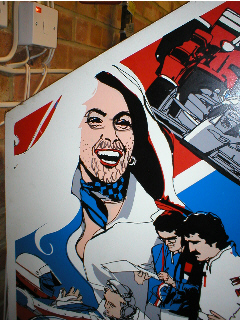 |
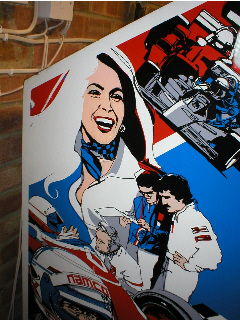
Graffiti.
As with alot of old Arcade games, idle teenagers find it fun to mutilate them and if they are not pulling off sideart, they are drawing over the top of it ! On this cab the only bit that let it down was this, where some idiot had given the smiling woman, glasses and a beard. Where i am a printer by trade, i have alot of solvents a chemicals at my disposal. I started with regular grade A white spirit and a soft cloth and worked in circles, this didnt make much difference, so after giving it a wipe over with plain water, i tried something else. WORD OF WARNING !! I do not advise anyone else try using solvents on their cab sideart, in case it removes the side art too ! I got Delta metering roller cleaner, something i know is good for removing ink but not paint, and it has a high evapouration rate. This i tried right at the bottom corner of the cab, right at the edge, just to make sure it didnt cause any damage. When this was o.k. i then tried it on the graffiti, again working in circles. This i would do for a minute at a time and then i would use a sponge with just water on to finish off. This i found got 99.9% of it off, so at least it looks better now. |
 |
![]()
 |
Power
Supply Unit (p.s.u). I then turned my attentions to the power supply unit, which was missing its mains lead. I had asked at Swallows about a connector plug, but they did not do this type. So i decided to take the unit out and see what i could do. |
![]()
 |
Power
Supply Unit (p.s.u) cont....
I unclipped the plug from the side of the metal case, so i could get at it easier and found that with the use of a small flat bladed screwdriver i could press the retaining lips on the pins and pull them out of the plug, i did it this way so i could save the plug, in case i wanted to use it again, as i can always get new pins.. I then cut the pins off the wires and used terminal block connectors to join them to a new mains cable. |
 |
![]()
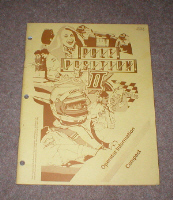 |
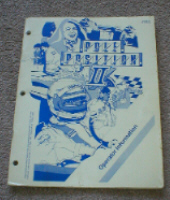
Origional
Manuals. |
 |
![]()
 |
 |
 |
|
Monitor
and missing power loom.
I now have the Monitor back all fixed, the problem not being a dead LOPT but several dead components on the chasis, i have installed it back in the cab, using 4 bolts with nuts and lock washers, so it is in there securely now ! Swallows managed to supply me with the missing power lead and connector for the Monitor. I now have to work out what wires go where and just connect them all up. |
![]()
 |
Monitor
Bezel re-fit. Now the Monitor is securely back in the cab, i can re-fit the black cardboard Bezel. Using an upholstery staple gun, i re-attatched it to the cab in 4 places, just as it would of been when the cab was built. Once this was in place, i gave the Monitor glass a clean with a duster and some glass cleaner, but only spraying glass cleaner on the non painted glass areas. This was then cafefully placed in position and the control panel lifted up and clipped back into place. |
![]()
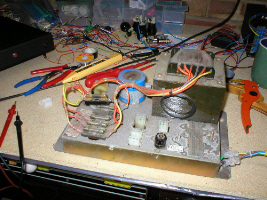 |
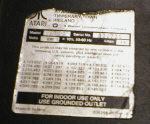
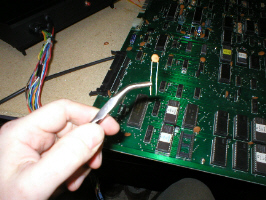
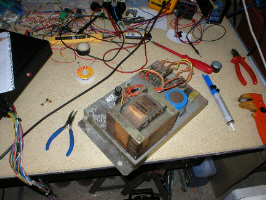
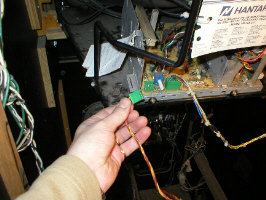
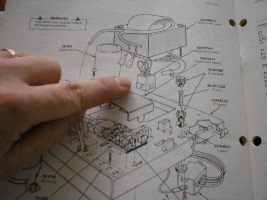
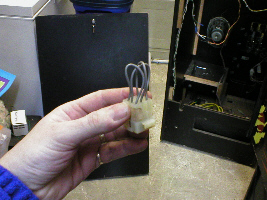
Power
Supply Unit (p.s.u) cont....
After making a mains lead i replaced the p.s.u. into the cab and tried to power it up, but got nothing. The cab was completely dead, so i got out the manual and looked to see if there was a schematics for it and found an exploded diagram. This showed a little plug called a "Voltage selector plug" that happened to be missing from my p.s.u. It just has some loops of wire on it and depending on which country the machine was for, the loops would be located differently to select the voltage for that country. I have now been told that the p.s.u. will not fire up with out this plug fitted. |
 |
![]()
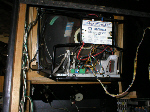
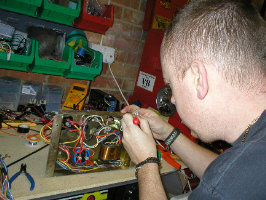
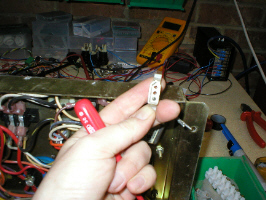
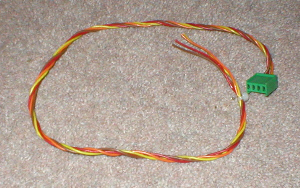
| Power
Supply Unit voltage selector plug. I could not manage to find a U.K. 240v one, so i had to get one for another country and re-pin it to U.K. spec. The manual states that the different colours are Blue 220v, Violet 100v, Brown 240v depending on which country the cab was destined for. But this one had Grey wires, so no idea which country/voltage it was for, but it has now been re-pinned to the U.K. Brown 240v pinouts. This was then fitted to the p.s.u. and then the cab was switched on, but again the cab was dead. I took the p.s.u out again and bench tested it with a multimeter, i had 240v in and through the main fuse ( the one in the black housing) and going in to the transformer, but nothing coming out. So it looks like the transformer is dead. |
 |
![]()
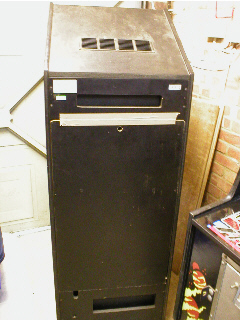 |
Back
Door.
When i got the cab, it had no lock on the back door and it was just taped shut to stop it falling out. Luckily a while back i bought a bunch of about 6 locks on U.K. Ebay at £2.00 each, as some of my other cabs were missing locks too. So this was a easy thing to replace. |
 |
![]()
Click for page 2.
![]()
Click for Home.
![]()